
Hey there! I'm a supplier of Truck Wall Panels, and I know firsthand how frustrating it can be when you've got a single damaged truck wall panel. But don't worry, replacing it isn't as hard as it might seem. In this blog post, I'm gonna walk you through the whole process step by step.
Step 1: Assess the Damage
First things first, you need to take a good look at the damaged panel. Check out how bad the damage is. Is it just a small dent, or is there a big hole? If it's a minor scratch or dent, you might be able to fix it without replacing the whole panel. But if there's a large crack, hole, or the panel is severely bent, you'll definitely need to replace it.
Step 2: Gather Your Tools
Before you start the replacement process, make sure you've got all the necessary tools. You can find a great selection of tools in our Toolbox. Here's what you'll probably need:
- Screwdriver set: You'll use these to remove the screws holding the damaged panel in place.
- Pliers: Handy for pulling out any nails or clips.
- Measuring tape: To get the right dimensions for the new panel.
- Safety glasses and gloves: You don't want to hurt yourself during the process.
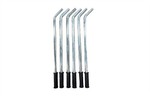
- Panel removal tool: This can help you gently pry the panel away from the truck without causing more damage.
Step 3: Remove the Damaged Panel
Now it's time to get that damaged panel out of there. Start by removing any screws or clips that are holding the panel in place. Use your screwdriver or pliers to do this. Be careful not to lose any of the small parts.
Once the screws are out, use the panel removal tool to gently pry the panel away from the truck. Start at one corner and work your way around. Sometimes, the panel might be stuck due to rust or adhesive. If that's the case, you can use a little bit of lubricant to help loosen it up.
As you're removing the panel, keep an eye out for any wires or connectors that might be attached to it. If there are, carefully disconnect them. Make sure you remember how they were connected so you can put them back the same way later.
Step 4: Measure for the New Panel
After you've removed the damaged panel, it's time to measure for the new one. Use your measuring tape to get the exact length, width, and thickness of the old panel. It's really important to get these measurements right, because if the new panel doesn't fit properly, you'll have a whole new set of problems.
Write down the measurements and double - check them. You can also take a picture of the old panel and the area where it was installed. This will give you a better idea of what the new panel should look like and how it should fit.
Step 5: Choose the Right Replacement Panel
Now that you have the measurements, it's time to choose the right replacement panel. As a supplier of Truck Wall Panels, we've got a wide range of options to choose from. One popular choice is the T Lock Panel. It's known for its durability and easy installation.
When you're choosing a panel, make sure it matches the material and style of the other panels on your truck. This will ensure that your truck looks consistent and professional.
Step 6: Install the New Panel
Once you've got the new panel, it's time to install it. Start by aligning the new panel with the opening on the truck. Make sure it fits properly and all the holes line up.
If there are any wires or connectors, reconnect them according to the way you disconnected them earlier. Then, start inserting the screws or clips to hold the panel in place. Tighten the screws, but don't over - tighten them. You don't want to strip the threads or damage the panel.


Step 7: Check the Installation
After you've installed the new panel, give it a good check. Make sure it's securely attached and there are no gaps or loose parts. Try opening and closing any doors or hatches that are near the panel to make sure they still work properly.
If everything looks good, you're almost done. But if you notice any issues, like the panel not fitting right or a loose connection, go back and fix it before you call it a day.
Step 8: Finishing Touches
Once you're satisfied with the installation, you can give the new panel a little cleaning. Wipe it down with a clean cloth to remove any dust or fingerprints. You can also apply a protective coating if you want to keep the panel looking good for longer.
That's it! You've successfully replaced a single damaged truck wall panel. It might seem like a lot of work, but with the right tools and a little patience, you can do it yourself.
If you're in the market for high - quality truck wall panels or any of the tools I mentioned in this post, don't hesitate to reach out. We're here to help you find the best products for your needs. Whether you're a professional mechanic or a DIY enthusiast, we've got what you're looking for. Contact us to start a purchase negotiation, and let's get your truck back in top shape!
References
- "Automotive Body Repair Manual" - A comprehensive guide on various automotive repair procedures.
- "Truck Maintenance Handbook" - Contains useful information on maintaining and repairing trucks.