
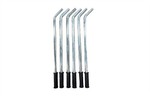
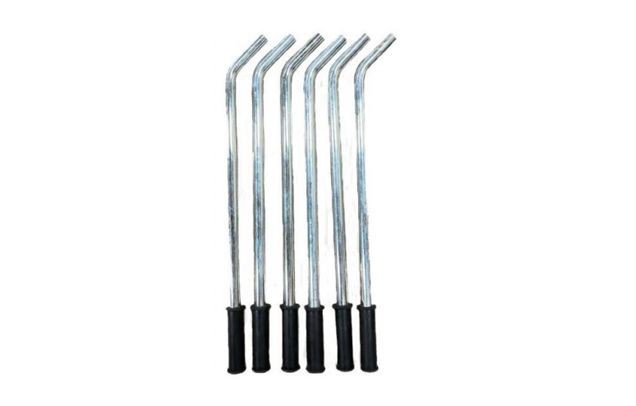
Hey there! I'm a supplier of Ratchet Style Tensioner Handles, and today I'm stoked to share with you how to make a homemade one. Whether you're into DIY projects or just short on cash to buy a new one, this guide will walk you through the process step by step.
Why Make Your Own Ratchet Style Tensioner Handle?
First off, you might wonder why you'd want to make your own. Well, for starters, it can save you money. Buying a brand - new tensioner handle can be pretty pricey, especially if you're on a tight budget. Second, making it yourself gives you the freedom to customize it according to your needs. You can adjust the length, shape, and even the grip to suit your specific tasks. And let's not forget the satisfaction that comes with creating something useful with your own two hands.
Tools and Materials You'll Need
Before we start, let's gather all the necessary tools and materials. Here's what you'll need:
- Metal Rod: You can use a steel or aluminum rod. The diameter depends on how strong you want your handle to be. A 1/2 - inch diameter should work well for most applications.
- Ratchet Mechanism: You can either salvage one from an old tool or buy a new one from a hardware store. Make sure it has a smooth and reliable operation.
- Welding Equipment: If you're using metal, you'll need a welder to join the parts together. A MIG welder is a good choice for beginners.
- Cutting Tools: A hacksaw or a metal cutting grinder can be used to cut the metal rod to the desired length.
- Drill and Bits: You'll need to drill holes for the ratchet mechanism and any other attachments.
- File or Sandpaper: To smooth out any rough edges after cutting and welding.
- Grip Material: You can use rubber tape, foam, or even old bicycle handlebar grips to make the handle more comfortable to hold.
Step 1: Cut the Metal Rod
Measure and mark the length of the handle you want on the metal rod. Remember to consider the length needed for the ratchet mechanism as well. Use your cutting tool to cut the rod at the marked point. Be careful when cutting to ensure a straight and clean cut. Once you've cut the rod, use a file or sandpaper to smooth out the edges.
Step 2: Prepare the Ratchet Mechanism
If you're using a salvaged ratchet mechanism, clean it thoroughly to remove any dirt, grease, or debris. Check for any damaged parts and replace them if necessary. If you're buying a new one, make sure it comes with all the necessary hardware.
Step 3: Drill Holes in the Rod
Using your drill and appropriate drill bits, drill holes in the metal rod where the ratchet mechanism will be attached. The size and location of the holes depend on the design of the ratchet mechanism. Make sure the holes are straight and accurately positioned.
Step 4: Attach the Ratchet Mechanism
Insert the ratchet mechanism into the drilled holes and secure it using bolts and nuts. Tighten the bolts firmly to ensure a strong connection. You may need to use a wrench or pliers to do this. Check if the ratchet mechanism moves smoothly after attaching it.
Step 5: Weld (Optional)
If you want a more permanent and stronger connection, you can weld the ratchet mechanism to the metal rod. This step requires some welding skills, so if you're new to welding, you might want to practice on some scrap metal first. Wear appropriate safety gear, such as welding gloves and a face shield, when welding. Once the welding is done, let the weld cool down and use a grinder or file to smooth out the welded area.
Step 6: Add the Grip
Now it's time to add a grip to your handle. Wrap the rubber tape or foam around the handle, starting from one end and working your way to the other. Make sure the grip is evenly applied and there are no loose ends. If you're using old bicycle handlebar grips, you can cut them to the appropriate length and slide them onto the handle. This will make the handle more comfortable to hold and reduce the risk of slipping.
Step 7: Test Your Homemade Ratchet Style Tensioner Handle
Once you've completed all the steps, it's time to test your newly made handle. Use it on a suitable tensioning application, such as tightening a chain or a belt. Check if the ratchet mechanism works properly and if the handle can withstand the tension. If you encounter any issues, you can make the necessary adjustments.
Other Related Products
While you're in the mood for DIY projects, you might also be interested in some other automotive - related products. You can check out our Brake Shoes, Refrigerated Truck Rear Frame, and Crowbar. These products are made with high - quality materials and can be a great addition to your tools or automotive repair projects.
Conclusion
Making your own Ratchet Style Tensioner Handle is not only a fun DIY project but also a practical way to save money. With the right tools and materials, and a little bit of patience and skill, you can create a handle that meets your specific needs. If you have any questions or need further advice on making this handle or any other product - related inquiries, don't hesitate to contact me. I'm here to help you and look forward to discussing your procurement needs.

References
- "DIY Tool Making Guide" - A popular DIY magazine.
- "Automotive Tool Handbook" - A comprehensive guide on automotive tools.