
How to Replace the Handles on a Tool Cabinet
As a supplier of Tool Cabinets, I understand that over time, the handles on tool cabinets may wear out or become damaged. Replacing them is not only a cost - effective way to extend the life of your tool cabinet but also an opportunity to customize its appearance. In this blog, I'll guide you through the process of replacing the handles on a tool cabinet.
Step 1: Gather Your Tools and Materials
Before you start the replacement process, you need to collect the necessary tools and materials. Here's a list of what you'll typically need:
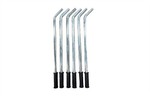
- New handles: You can choose from a variety of styles and materials, such as plastic, metal, or wooden handles. As a supplier, we offer a wide range of high - quality handles that are compatible with our Tool Cabinets and Carbon Steel Toolbox.
- Screwdriver: Depending on the type of screws used to attach the old handles, you may need a Phillips - head or flat - head screwdriver.
- Measuring tape: This will help you ensure that the new handles are installed at the correct position.
- Pliers: Useful for removing any stubborn or rusted screws.
Step 2: Remove the Old Handles
The first step in replacing the handles is to remove the old ones. Here's how you can do it:
- Locate the screws: Look for the screws that attach the handle to the tool cabinet door. They are usually located on the inside or outside of the door.
- Unscrew the handles: Use the appropriate screwdriver to loosen and remove the screws. If the screws are rusted or difficult to turn, you can use pliers to grip the screw head and turn it.
- Take off the handle: Once all the screws are removed, gently pull the old handle away from the door. Be careful not to damage the door or any other parts of the cabinet.
Step 3: Measure and Mark the New Handle Position
After removing the old handles, you need to determine the correct position for the new ones. This step is crucial to ensure that the handles are installed straight and function properly.


- Measure the distance: Use a measuring tape to measure the distance between the screw holes on the old handle. This measurement will help you align the new handle correctly.
- Mark the position: Place the new handle on the door in the desired position and use a pencil to mark the locations of the screw holes. Make sure the handle is centered and level.
Step 4: Drill Pilot Holes (if necessary)
Depending on the material of your tool cabinet door, you may need to drill pilot holes for the new screws. This is especially important if you are using a different type of handle or if the door is made of a hard material like metal or thick plastic.
- Select the appropriate drill bit: Choose a drill bit that is slightly smaller than the diameter of the screws you will be using.
- Drill the pilot holes: Carefully drill the pilot holes at the marked locations. Make sure the holes are straight and of the correct depth.
Step 5: Install the New Handles
Now it's time to install the new handles. Follow these steps:
- Align the handle: Place the new handle on the door, aligning the screw holes with the pilot holes (if drilled) or the marked locations.
- Insert the screws: Insert the screws through the holes in the handle and into the door. Use the screwdriver to tighten the screws, but be careful not to overtighten them as this may damage the door or the handle.
- Check the functionality: Once the handles are installed, test them to make sure they open and close the cabinet doors smoothly. If the handles feel loose or do not operate properly, you may need to adjust the screws or the position of the handle.
Step 6: Finishing Touches
After installing the new handles, you can give your tool cabinet a final touch - up.
- Clean the area: Use a clean cloth to wipe away any dust or debris from the handles and the door.
- Inspect the cabinet: Check the rest of the tool cabinet for any other signs of wear or damage. You may want to perform some general maintenance, such as lubricating the hinges or drawers.
Tips for a Successful Handle Replacement
- Choose the right handles: Consider the size, style, and material of the handles to ensure they are compatible with your tool cabinet and meet your needs.
- Take your time: Rushing through the replacement process can lead to mistakes. Make sure you measure and mark the positions accurately and install the handles carefully.
- Keep the old handles: If you ever need to replace the new handles in the future or if you want to restore the original appearance of the cabinet, you can keep the old handles as a backup.
Why Choose Our Tool Cabinets and Handles
As a leading supplier of Tool Cabinets and Carbon Steel Toolbox, we take pride in offering high - quality products. Our tool cabinets are made from durable materials and are designed to withstand the rigors of daily use. The handles we provide are not only functional but also stylish, adding a touch of elegance to your tool cabinet.
If you are in the market for new tool cabinets or replacement handles, we invite you to contact us for more information. Our team of experts is ready to assist you in finding the perfect products for your needs. Whether you are a professional tradesperson or a DIY enthusiast, we have the right solutions for you.
Don't hesitate to reach out to us for a detailed discussion on your requirements. We look forward to the opportunity to work with you and provide you with the best tool storage solutions.
References
- "Tool Cabinet Maintenance Guide" - A general guide on maintaining tool cabinets, which includes information on handle replacement.
- "Hardware Installation Manuals" - Manuals provided by hardware manufacturers that offer detailed instructions on installing different types of handles.